I decided that the hazy forest was way to low, so I painted one above it. This time it was painted greener. The blue forest was over painted with white clouds.
No I don't wear pink sweaters, I got my wife to hold the brush to demonstrate how to make lots of far off trees. This is a 1/2 inch flat brush that has a taper on the end. With the longest bristles at the top, lightly touch the wall and drag the brush down. Repeat, repeat, repeat, well you get the idea. Start with a light green, over lay with a darker green, then overlay that with a light green to build up a forest in layers. The furthest trees can be blue. You don't have to clean your brush between shades, that way you get even more colours.
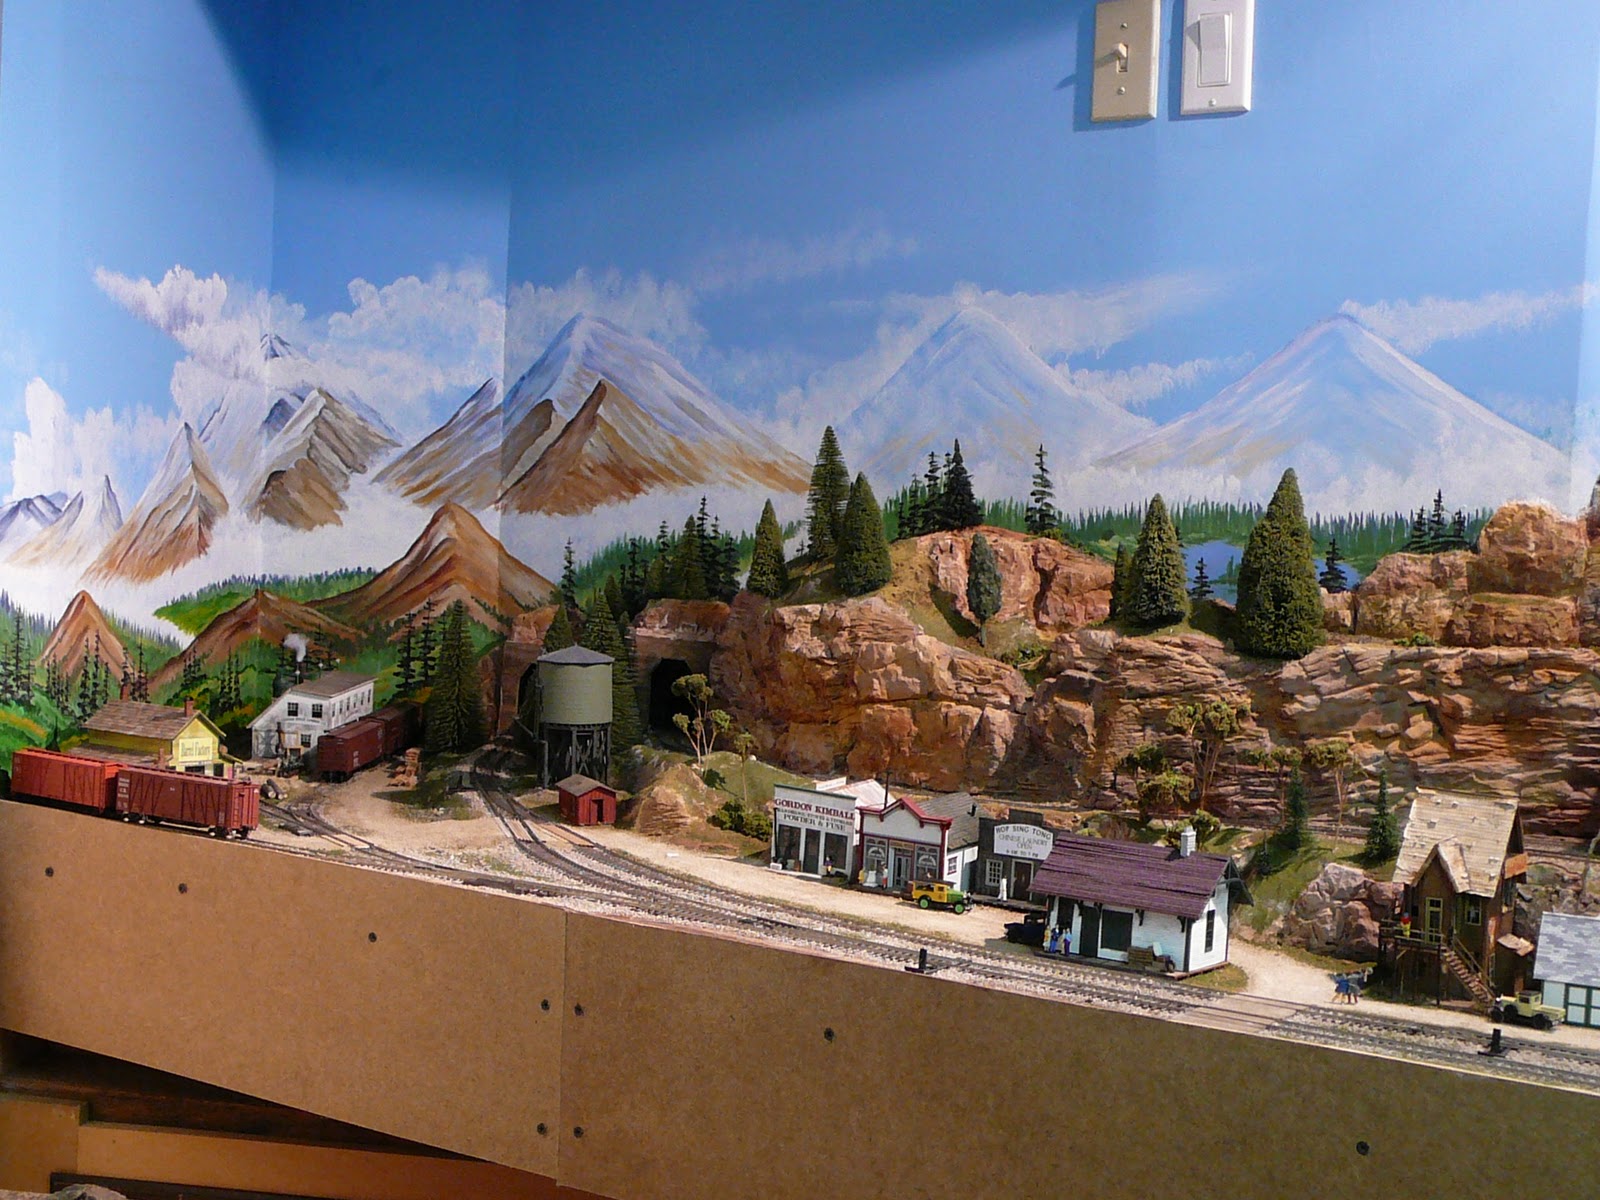
A lake was added to the backdrop. Just like real water avoid diagonal shorelines, instead work the edges back and forth. Use the flat brush on its side to lay in the grassy shore. For the reflection below the island paint in some green horizontal lines below the trees and then lightly drag the brush across them to make them smear.
To make the foreground trees are made with the same flat brush, using it to draw a straight line/trunk with black paint. Starting at the top just touch the trunk, angling your brush down to the left and then to the right as you go down the trunk. Widen the branches as you go. When the black is dry you can go back and highlight the branches with a lighter colour, yellow really jump out.
Not liking all the low lying clouds, I painted the mountains down a little and added another row of far off trees.
Using a fan brush and various earth tones tap in rows of ground cover, vary the colours and overlap them so you don't end up with hedge rows. I use pastel paints for this as it stands out more. You can see the tole painted trees are not as bright in the distance, just what you want.
Deciding that there was still too many low clouds, in went more mountains, I had to move Cougar Lumber Co. to get at this last area. Try to make the mountains in the front darker, that brings them forward. Green valleys were also added to the mountains for more detail. The hardest part when doing 10 feet of wall is keeping the trees the right size for the spot they are in, step back and check often. The closest valleys have little trees up in by just touching the wall with the tip of the brush.

I still didn't like all that white, so more of it was painted over. Note in the green area just left of center, how the darker green lines define distant contours. These lines are made by loading one edge of your brush with a darker paint and dragging it down hill, just letting the paint come off the top edge of the brush as you go. You can add lots of these in minutes. More foreground trees were add. You can just make out a small clump of these between the tops of the buildings, a nice trick to give the scene more depth.
The scene is complete. Now I can see why the railroad had to build a tunnel here, its not just a blue wall anymore.
Hope you give it a try. Remember perspective is everything, light on dark on light, and if you goof up, just paint it white and start again.


No comments:
Post a Comment