
Saturday, April 28, 2012

Wednesday, April 11, 2012


Friday, February 24, 2012
Boats

Three new boats, the coal scow is just being worked on.

A small boat for my harbour

Drag net boat. Like how this one turned out.
Friday, January 20, 2012
Lumber camp
 New details added to my lumber camp
 added a hut, barrel, crate, figure and a hose to the swamp, to this scene
 the camp now has 9 buildings if you include the out house.
Friday, January 6, 2012
Flood
The Applegate River on my Grants Pass Western railroad had a flood (read dishwasher leak) just like the real location does. No damage, but my wife is happy with her new dishwasher.
Tuesday, December 13, 2011
Card forwarding
THE GRANTS PASS CARD FORWARDING SYSTEM
I have studied many forms of card forwarding systems in the past and even had thought of this system many years ago, but had never really developed it fully. Then came the computer and with it an array of car forwarding programs. The one I tried didn’t work well (which may have been the way I input the required information, although the group I railroad with also tried it with the same result). We had tried a card system before, which employed a pocket card for the rolling stock and separate cards for industries. Carrying all the cards and sorting the industry cards and all the required pockets at each town wasn’t what we wanted either. So I dusted off my old system and presented to the group. They of course were hesitant to get new cards made before we discussed it fully. After a little brain storming, it became evident that this just might work. Simplicity is its beauty (although it may not sound like it when I try to explain it). Essentially you make up a card for each piece of rolling stock and mark down 23 locations for it to go to and check off each location as you deliver it there (we use three check off columns, tripling the cards use, we use a left hand slash the first time through, a right hand slash, making it an X the second time and filling it in the last time tripling its use again, for a total of 207 moves). If you have more than one major yard, as with the OWR, (the name of the railroad of our group) every other location should be "YARD" and when you have finished your route at a major yard that is where you will leave all the cards you have started with. Each card will show where the rolling stock was left, be it in the yard of at an industry. My railroad the GPW has only one major yard so I do not have to have "YARD" as every other location. Also on the OWR we have four interchanges, three that feed staging areas and one that feeds a branch line. In these circumstances we have a clip to hold the cards for outbound rolling stock (the cards for inbound rolling stock will be in one of the "YARD" boxes. To make this move, the card will indicate "INTERCHANGE" and the town where it is located (eg. Alsop). In some cases, for instance where you have a yard crew for that town or a separate train for that route, the first location would be "YARD" and the town where it is located (eg. Alsop), then "INTERCHANGE" in that same town (eg. Alsop), then where it is going to (eg. Woodstock, and the card will be left there) and then "INTERCHANGE" (where it started eg. Alsop). One thing to remember is that the last location on the card, should be able to deliver that piece of rolling stock to the first location on the card, when you start checking off the second column. To deliver freight to the stations on the GPW I have a clip at each station, and leave the card there, the next train through picks up the car (if the train is heading toward the next location on that card, and the card, keeping the main line clear.
To fill out the locations on the cards, you should make a list of all the destinations on your railroad and there capacity. Then use these locations proportionately. When you are having a session, and you find a yard is too full, cherry pick cards leaving the yard instead of picking the first ones. If a destination is full, either deliver the car and card to the yard you are going to, if you picked it up at a yard, or check off that destination and take the car to the next one, on the OWR that would be a yard, on the GPW it could be another industry, (which you may have to deliver on your return trip). Cards in the yard pockets, can be shuffled once and a while to keep things random. On the GPW, I use short trains, but have to pick 12 cards, from the front of the deck, to get a train of 3 to 5 cars. This is because some of the cars are to be picked up at industries along the way and some may even be switched in the same town as the yard. On the OWR we have a maximum length of 13 cars, so more cards will have to be picked, but because the main yards are large, more of the cards you pick will be outbound from the yard. For random variety on the OWR, we may make a card out for the work train. If an operator picks that card he would put the other cards back and run the work train to its destination, do the work required and run it back, really mucking up the other train schedules. Yes the OWR still need train schedules. One for each of the staging yards, one for the branch line, one of the coal turn, at least 2 passenger trains, and some locals. One of the benefits of this card system is you do not have to wait on anyone else delivering a certain car, because you can’t have picked a car if some one else has it in their train. Also you will not have a car go between two location in one town, over and over again, unless you enter them that way.
 The card at the left shows the car is at Grants Pass Yard, it will next go to CJ (Cave Junction) to the Barrel Factory. The card is about 3 ½ inches by 5 inches, printed on card stock. I set up a template file with four cards on it, I then fill in all four cards and save it as card1 the next are saved as card2 etc. I write on the back of each card, after I cut them out the file name. I also use the back of the card to list any maintenance problems with the car.
Tuesday, December 6, 2011
Finishing up Cave Junctions backdrop


To make the foreground trees are made with the same flat brush, using it to draw a straight line/trunk with black paint. Starting at the top just touch the trunk, angling your brush down to the left and then to the right as you go down the trunk. Widen the branches as you go. When the black is dry you can go back and highlight the branches with a lighter colour, yellow really jump out.


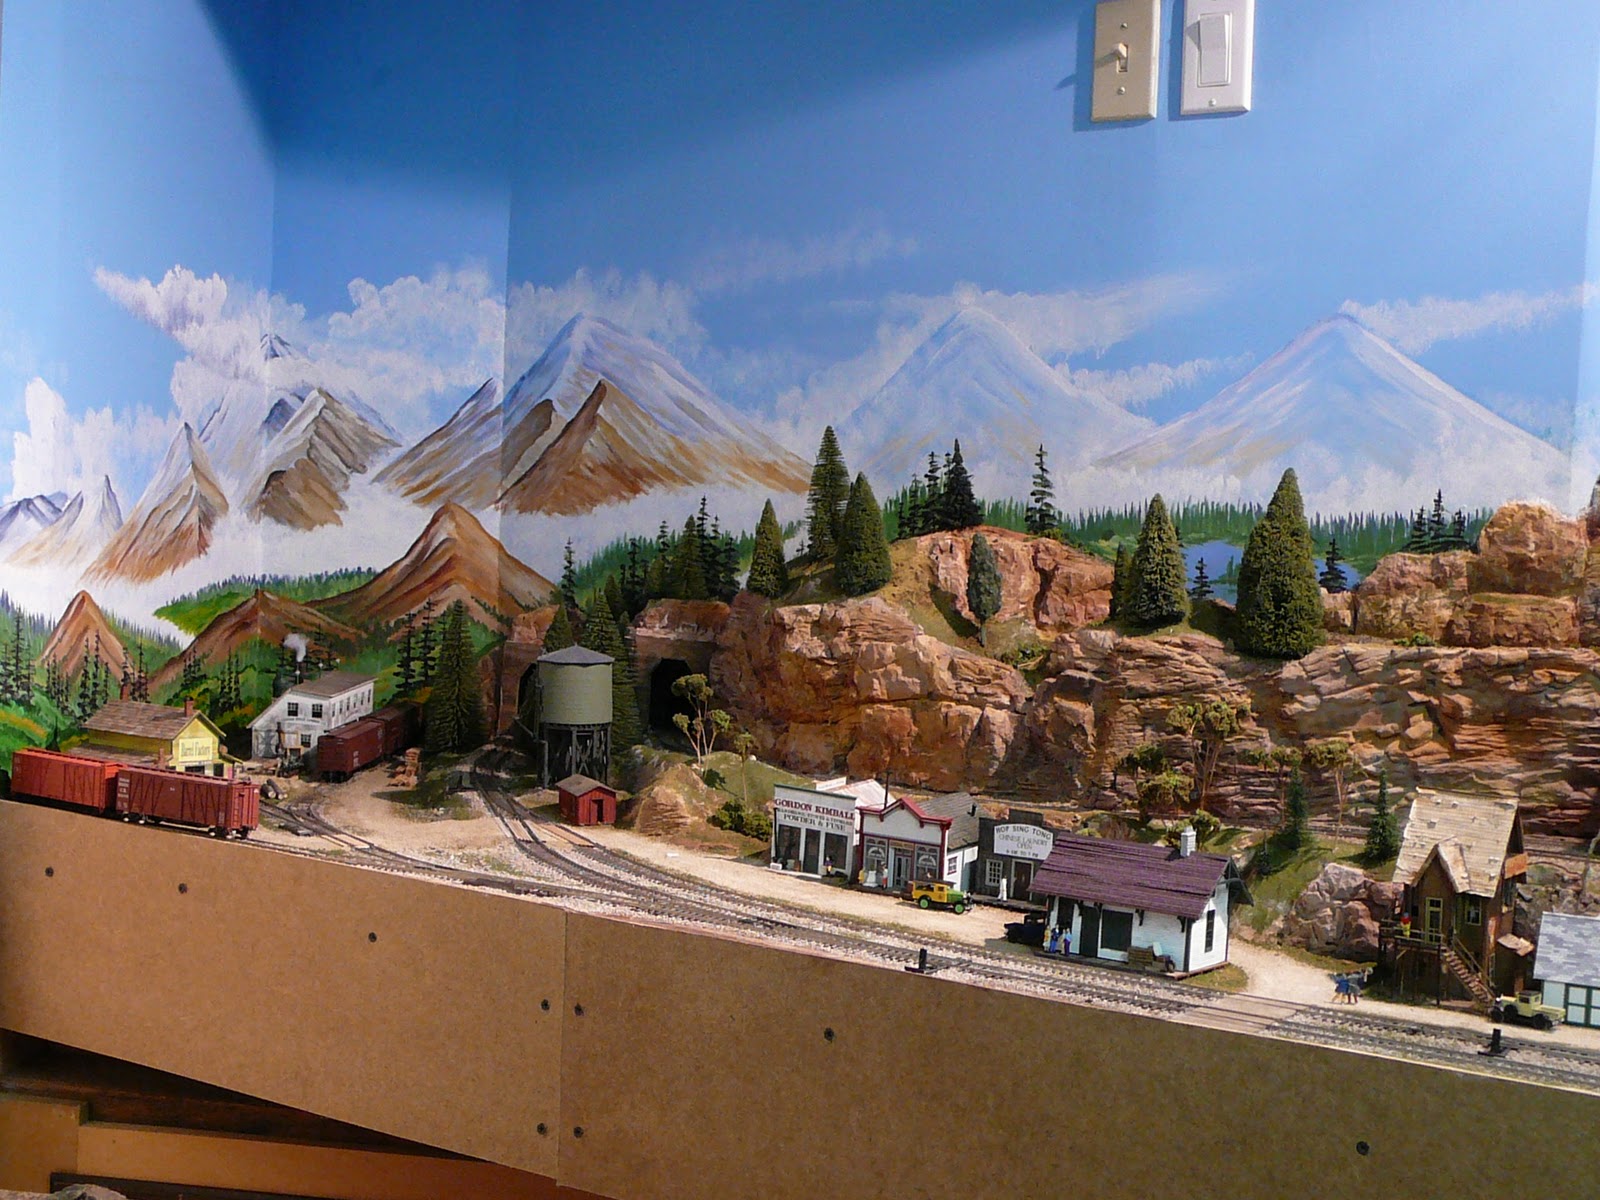


Hope you give it a try. Remember perspective is everything, light on dark on light, and if you goof up, just paint it white and start again.
Subscribe to:
Posts (Atom)